Halloween 2017 is fast approaching and as per usual, I’m busy making new decorations to decorate our Halloween tree.
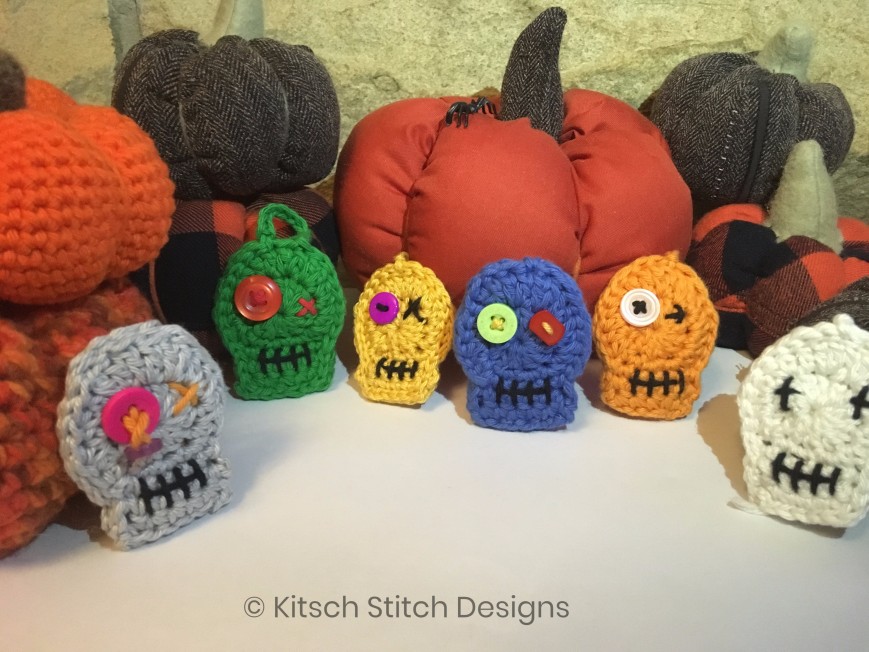
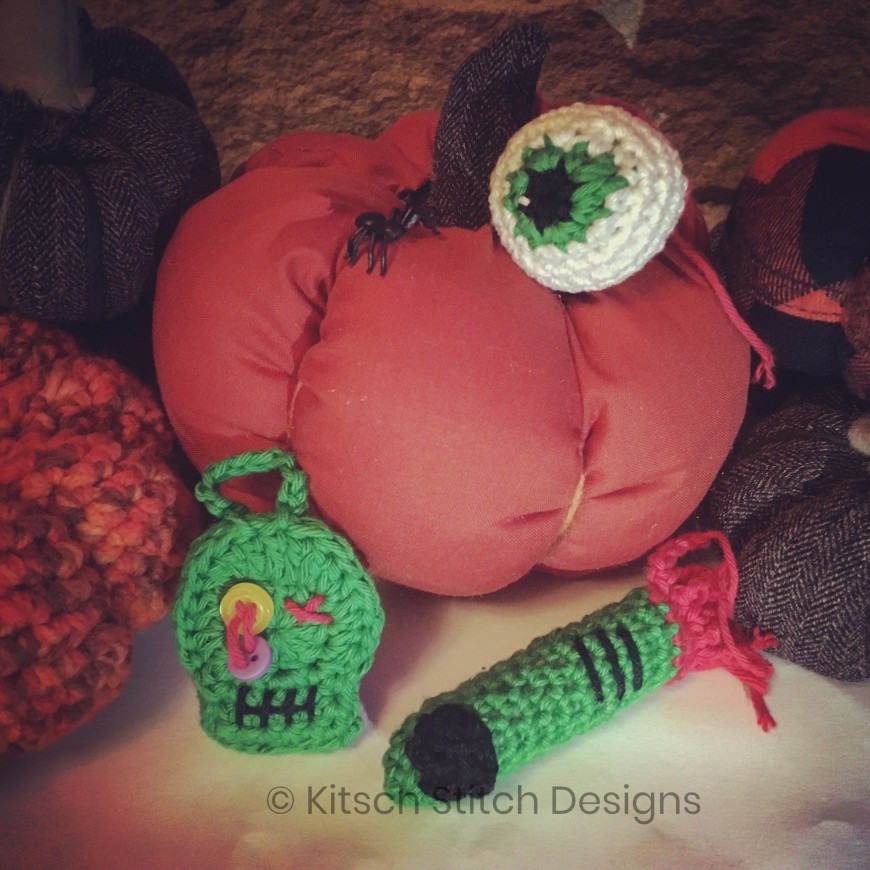
This year it’s been pumpkins (both crocheted and fabric), eyeballs, severed fingers and these delightful little zombie skulls.
The best thing about these skulls is how super simple they are to make and how little time they take. Minus taking in the ends, I could make a blank skull in less than 5 minutes.
So here’s how to do it…

- Yarn – Double Knit (cotton is my preference)
- Hook – 3.5 but use whatever you need to get a tight crochet
- Extras – Black yarn or embroidery floss for the mouth, a second colour for the eyes and some small buttons of various colours.
Instead of designing a pattern myself this time I found a super one by Heather Jarmusz on Ravelry so I used that to make the blanks. You can find them here:
Ravelry – https://www.ravelry.com/patterns/library/spooktacular-sugar-skull-applique
Facebook – https://www.facebook.com/hamandeggscrochet
As I wanted to make a hanging decoration that looked good on both sides I made two of every colour with a view to crocheting them together.

Then I set about decorating them with a mouth and button eyes.
The decorating
Using black double knit cotton or embroidery floss, do a straight line across between round 2 and row 1. Then, do a series of straight lines down, crossing the line as above in the finished skull. I am going to try out one with fangs and blood so if it works, I’ll post that as an alternative to this traditional skull mouth.


The eyes are next and this is where you get to have fun and decide what type you want to do. Two of my nieces and nephews were with me when I was decorating these so I let them loose with the designs and did what they asked.
To do the hanging eyeball take two buttons, one slightly smaller than the other. Thread them both onto some double knit cotton.

When you’ve done, pull the cotton through the font of the skull, making sure you keep the loose thread between the two buttons. Normally, at this point I’d be encouraging you to keep the back of your work as neat as possible. Thankfully, as you won’t be able to see the back you don’t have to worry here. I’d place a knot at the back to secure the larger button and make sure there is still loose thread between the two. Once it’s secure, pass the needle back through the empty two holes in the button to ensure it’s not going anywhere. At this point, I’d like to caveat that these are decorative items and not suitable for young children due to the buttons.


For the second eye you could the same the again, do a cross or add just one button.


Now go ahead and do the second one. You could do it to match the front or have both sides different.

When you’ve got both sides done it’s time to crochet them together. Hold them, wrong sides together and put your hook through the 1 ch at the end of the last row.
Do 1 chain then slip stitch in every stitch around making sure you go through both the front and the back skulls.


When finished, take in the ends and add a loop to the top for hanging.


And you’re done!
I’d love to see any that you’ve made.
